Attention
Attention
TACTICAL INNOVATIONS® ELITE22™ VEGAS GOLD RIFLE BUILD KIT
- CUSTOM SHOP / LIMITED QUANTITY
In addition to the standard stocking Tactical Innovations® receiver and
parts colors, we are pleased to be able to offer this limited edition
rifle kit color through our custom shop in order for us to judge customer demand for additional colors that might be added as standard stocking colors in the future. We're offering some custom options such as this one subject to stock on hand which is very limited and not available for backorder requests.
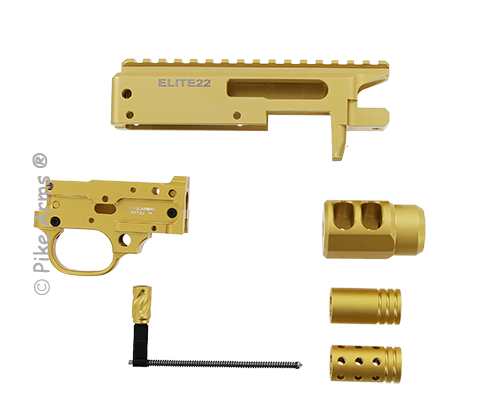
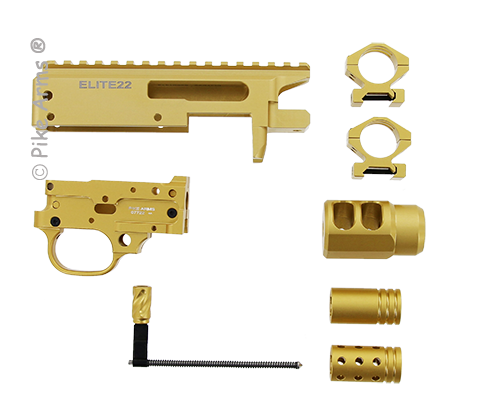
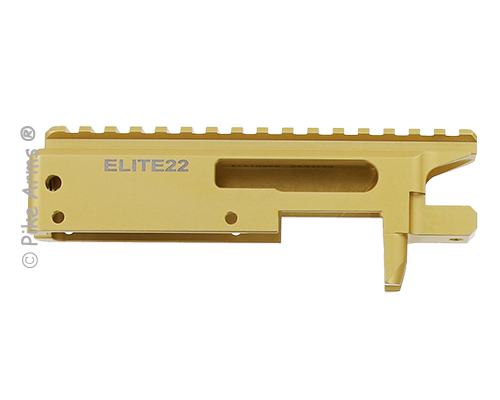
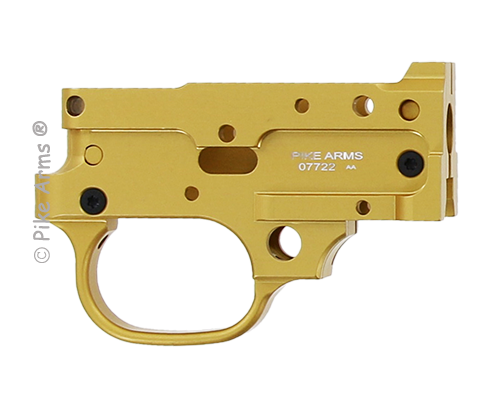
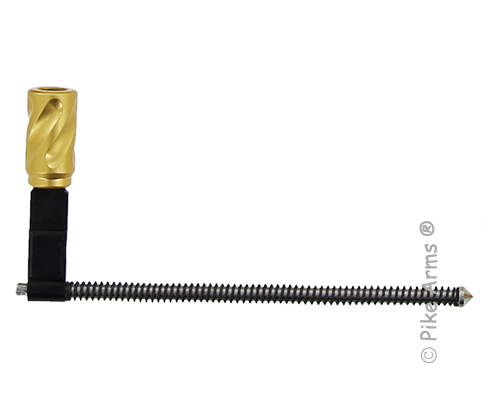
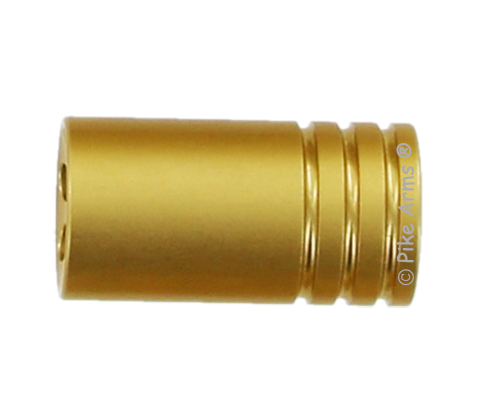
Each Rifle Build Kit will include EXACTLY what you see in the product picture. This Tactical Innovations® ELITE22™ VEGAS GOLD RIFLE BUILD KIT includes the following matching VEGAS GOLD anodized color parts:
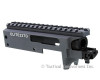
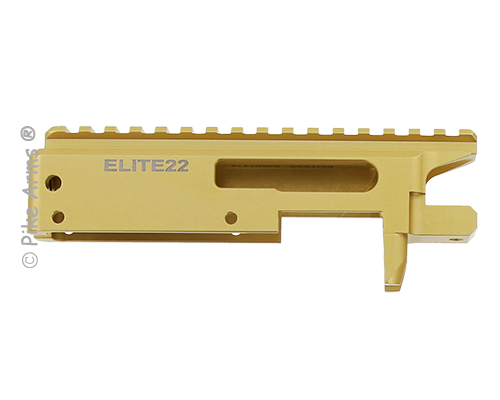
1. Tactical Innovations® ELITE22® Receiver (FFL Required)
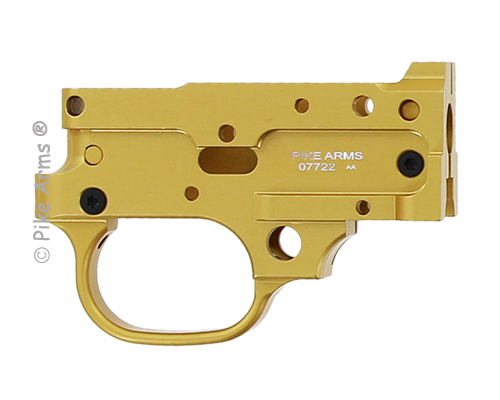
2. Pike Arms® Match Grade Target Billet Stripped Trigger Housing (Available Option As A Complete Trigger Assembly)
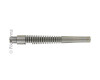
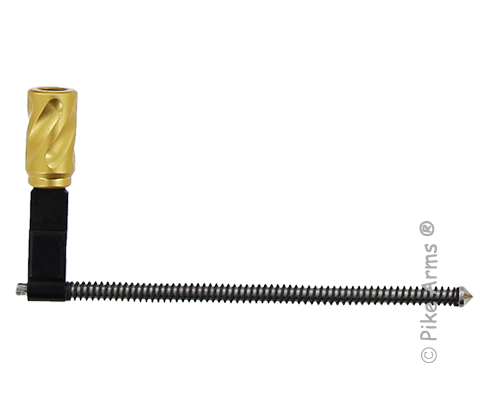
3. Pike Arms® Spiral Fluted Lightweight Charging Handle Assembly - Crimped
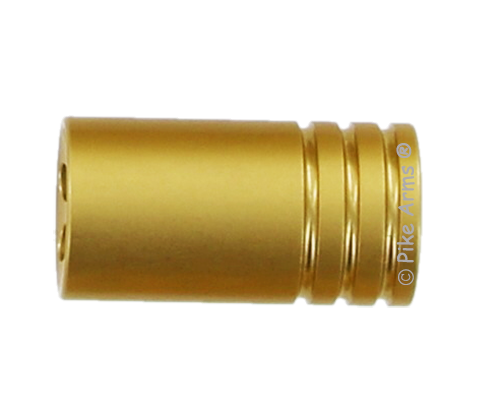
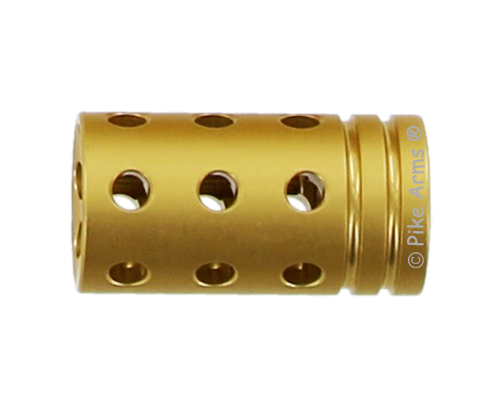
4. Pike Arms® .920 22LR Flash Hider - Threaded 1/2 x 28 TPI
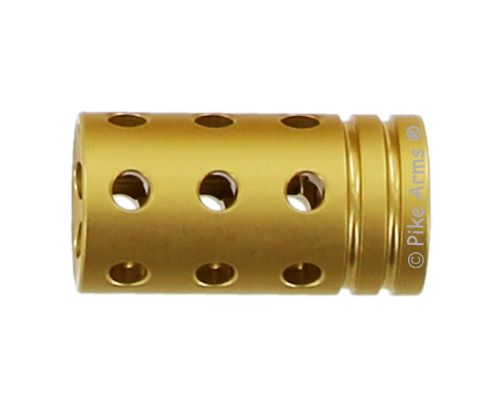
5. Pike Arms® .920 22LR Flash Hider / Compensator - Threaded 1/2 x 28 TPI
6. Pike Arms® M110 Muzzle Brake - Threaded 1/2 x 28 TPI
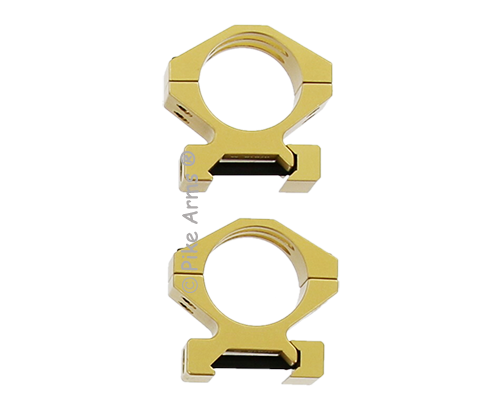
To complete your color themed build, you have the option of adding matching color Pike Arms® Billet CNC Precion Machined Low Profile 1" Scope Rings (subject to limited availability).
Additional optional parts which are available and recommended for your rifle build are:
1. Pike Arms® Match Grade Target Trigger Assembly which will be installed in the Pike Arms® Match Grade Target Billet Stripped Trigger Housing at not additional cost (when ordered at the same time as the parts set)
2. Pike Arms® Receiver Hardware Assembly Package, which includes the necessary hardware to assemble your rifle, specifically:
2.1 Pike Arms® Adjustable V-Block with Allen Wrench
2.2 Pike Arms® V-Block Cap Screws
2.3 Pike Arms® Hardened and Precision Ground Cross Pins
2.4 Pike Arms® Red Bolt Buffer
2.5 Pike Arms® Receiver Stock Screw
3. Pike Arms® Target Match Grade Bolt Assembly, which includes:
3.1 Pike Arms Sharp® Claw Extractor
3.2 Pike Arms® Stainless Steel Chisel Point Firing Pin Assembly
The only additional parts you will need to easily complete your custom rifle (which are available separately) are a stock and a barrel. Tactical Innovations® offers a wide variety of Pike Arms® barrels in popular barrel lengths, materials and patterns to match any shooting requirement and similarly stocks a comprehensive assortment of stocks from leading name brand stock manufacturers.
With Pike Arms® parts, a custom high-end 10/22® compatible rifle is now a cost effective easy addition to any shooter's collection.
NOTE: This limited custom color is NOT compatible with and will not match any current stocking colors.
Ruger® & 10/22® Are Registered Trademarks of Sturm Ruger
Frequently Asked Questions For
TACTICAL INNOVATIONS® ELITE22⢠VEGAS GOLD RIFLE BUILD KIT
TACTICAL
INNOVATIONS’ ELITE22™
REPLACEMENT 10/22® RECEIVER
ASSEMBLY INSTRUCTIONS
Thank you for your purchase of a Tactical Innovations’ ELITE22™ receiver. The receiver is precision CNC machined from aircraft 6061 grade aluminum to provide years of reliability and pleasure. Please review these assembly instructions and tips before attempting to assemble your receiver.
The receiver can be assembled with Ruger® factory parts or a custom rifle can be assembled using our billet machined replacement parts. Parts manufactured by third party companies may also work but the use of parts from multiple different manufactures can often be problematic and require additional fitting and troubleshooting as a result of the tolerances for each part from each manufacturer.
BARREL INSTALLATION:
The barrel is installed using a V-Block and cap screws identically to the factory assembly. The shank on the barrel, regardless of the manufacturer, will be larger than the hole in the receiver and will not slip into the receiver without fitting. The receiver barrel hole is precisely machined and should not be “fitted” or modified during the assembly process; only the barrel shank should be fitted to the receiver. It is critical that the barrel shank have a light press fit into the receiver. If the barrel shank is loose in the receiver hole, then the barrel will droop when the V-block is tightened and it will be impossible to align a scope with the point of impact since the barrel will be slightly pointing down and will not be parallel with the bore.
To fit the barrel to the receiver, you will need to only remove a very small amount of material from the barrel shank (the part of the barrel that goes into the receiver hole). Do not use a dremel or similar power tool to grind on the receiver hole or the barrel shank. Use sandpaper or a flat file on the barrel shank only. One method is to roll the barrel across your lap while you use the file or sandpaper in order to ensure that you are removing the same amount of material from all sides of the barrel shank to maintain its concentricity. When fitted to the proper size, and with the barrel shank lightly oiled, you should be able to press the barrel shank into the receiver hole by hand without using a mallet or similar to hammer the barrel into the receiver. It should be tight but you should still be able remove it if necessary and be able to rotate the barrel in order to align the extractor slot with the extractor on the bolt.
With the barrel now fitted into the receiver hole, place the bolt in the receiver WITHOUT the recoil spring and with the bolt retracted for clearance, rotate the barrel so that the extractor in the bolt lines up with the extractor slot in the barrel. Use caution not to pull the extractor out of the bolt when rotating the barrel for alignment. Stand the receiver on the opposite end from the barrel and press down on the barrel into the receiver. Although a traditional V-block is often adequate, an ADJUSTABLE V-BLOCK (Part #00204) is recommended so that you can set the barrel to any angle relative to the bore. Install the V-Block and the cap screws hand tight. Torque the cap screws while pushing down on the barrel and verify that the barrel is not pulling toward the V-block as you tighten the V-Block. If the barrel is correctly fitted to the receiver hole, the barrel will not droop (ie pull toward the V-block). If it does, you will have to use an adjustable V-Block to prevent the barrel from drooping as the V-Block is tightened. Prior to the V-Block being torqued, verify that the extractor in the bolt aligns perfectly with the extractor slot in the barrel. Barrel installation is complete.
BOLT CONSIDERATIONS:
The width of the bolt is critical for safe and reliable operation. Ruger® factory bolts that have been “polished” will often then be too thin from the polishing process removing metal and a slam fire condition is possible. Do not use a Ruger® factory bolt that has been “polished” or otherwise modified in any way. When assembling your rifle, ensure that the bolt that you use is wide enough to not allow the bolt to hit the rim and fire the round if the bolt is pushed all the way to either side of the receiver. The entire rim of the round should always be in the corresponding pocket of the bolt regardless of the left or right position of the bolt in the receiver.
TROUBLE SHOOTING:
Chambering: In order for the rifle to successfully chamber the new round each time, the bolt face has to be smooth and have the correct geometry. Generally, a machined bolt will have a more uniform finish and geometry than a Ruger® factory cast bolt although cast bolts will work most of the time. The recoil spring has to have sufficient force to be able to drive the weight of the bolt forward and strip a round from the magazine. The magazine feedlips have to be designed to ensure that the feed angle will correctly present the round to the chamber. Plastic magazines often will wear out and the feed angle will change. Similarly, different brands of high capacity magazines will have different feed angle geometry resulting in one brand working well and another not working at all. In addition, the actual bullet shape of different brands of ammunition in high capacity magazines will change the feed angle relative to other brands of ammunition that have a different bullet profile. For testing, always use a Ruger® 10 round rotary magazine since the rounds are individually nested and are not stacked on top of each other.
The 10/22® rifle operates based on the blowback of the bolt by the brass when fired. In order for the rifle to function correctly, the recoil of the fired brass has to be greater than the combined resistance of (1) the weight of the bolt, (2) the force of the recoil spring (3) cocking the hammer and (4) the drag of the bolt on the receiver especially whennew, dirty or not oiled. Different brands of ammunition, especially bulk ammunition, will have lighter recoil than ammunition such as CCI® MiniMags®. Similarly, ammunition can have different blowback force from one round to the next due to powder variations in the ammunition. As a result, if the fired round does not blow the bolt all the way rearward each time, you will experience failures to feed as well as failures to eject.
Failure to Feed: When the bolt does not blow back far enough, it will not get behind the next round in the mag in order to strip and push it into the barrel. When this occurs, you will see the bolt stopped and usually dug into the lead bullet of the next round in the magazine. A similar condition, although more difficult to diagnose, occurs when the bolt does not blow back far enough each time and just barely blows back to minimally get behind the next round in the magazine, at which point you will not have the full travel and force of the bolt coming forward to strip the round out of the mag and run it into the chamber. To remedy this issue, you will have to shoot hotter ammo or reduce the countering recoil force as noted above by modifying the recoil spring.
Many third party barrel manufacturers will often use tighter chambers in an effort to increase accuracy. However, the tighter chamber (and often with no feedramp) combined with sharper edges on the chamber face, will make successfully feeding ammo from the magazine to the chamber much more difficult. To successfully feed ammunition into a tighter chamber with no feedramp and sharper edges, you may have to lightly polish the chamber end of the barrel and create a more accessible chamber for the round to be able to feed.
Stovepipe Failure: A stovepipe failure or similar with fired brass ending up jammed in the receiver is usually a function of the extractor on the bolt not pulling the fired brass out of the chamber as the bolt is recoiling to the rear of the receiver. Ideally, the brass would exit the barrel and stay on the face of the bolt without an extractor but the extractor makes sure that the brass leaves the barrel and stays on the bolt while the bolt recoils until the brass hits the ejector with enough force to be thrown out of the gun. If the extractor does not grab the brass out of the chamber or does not hold the brass on the face of the bolt, you should replace the extractor. We offer a Sharp Claw Extractor (Part # 00422 that is EDM cut and not stamped) that will cut into the brass to pull it from the receiver. Most extraction issues are due to the failure of the extractor, which is an easy and inexpensive part to replace.
A stovepipe stoppage can also occur when the bolt does not blow back far enough / hard enough for the brass to strike the ejector with enough force to kick it out of the receiver, and instead it simply falls off the bolt into the receiver. To remedy this issue, you will have to either shoot hotter ammunition or reduce the recoil resistance as noted above, with the easiest option being to clip one or two coils off the recoil spring while continuing to test after clipping each coil.
Reliable function and operation requires that all parts successfully work together as intended. Many issues can be determined and resolved by substituting known non-issue Ruger® factory parts out of the assembly one at a time until the problematic part(s) are identified. Although the majority of rifle assemblies can be completed without any issues (especially when using either all Ruger® parts or all Tactical Innovations’ parts), you should seek competent professional gunsmithing assistance should you encounter a situation that exceeds your comfort or experience level. We are happy to perform a comprehensive measurement and quality check on any of our receivers but do not offer assembly or trouble shooting gunsmithing services.
 This product can expose you to chemicals including lead, which are known to the State of California to cause cancer and birth defects or other reproductive harm. For more information go to www.P65Warnings.ca.gov.